

How to Restore Headlights
Keeping your vehicle clean, protected, and maintained is an important thing for many reasons. A clean vehicle looks nicer, holds its value better, and will last longer than one that is unkept. A clean and maintained car, truck, or SUV will also keep you safe. One of the single most important aspects of all of this is maintaining your headlights. Being able to see at night or in a storm is about as important as having brakes on your car. One of the biggest issues with modern headlights is that they are plastic and over time they fade, dull, yellow, and do not age as well as the old-school glass headlights that dominated the industry 20 years ago. Yellowing and foggy headlights will greatly reduce your visibility at night and in bad weather making them unsafe, and why this could be the most important thing on your car beside your windshield that you need to keep shiny, clear, and protected.
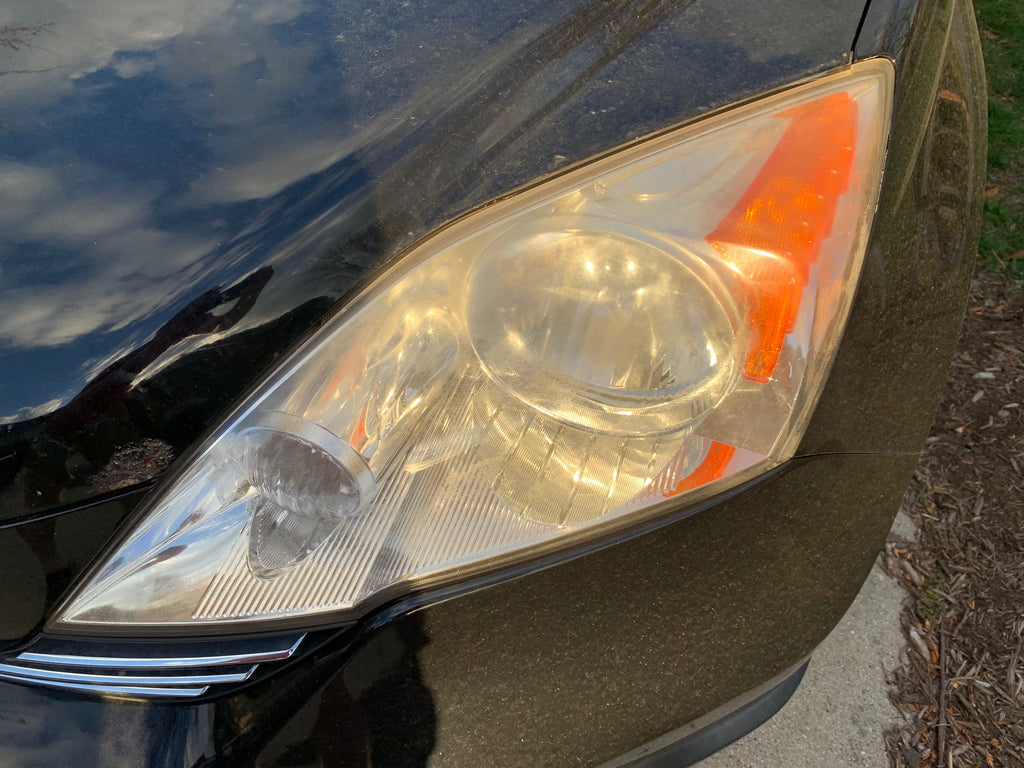
What causes headlights to oxidize and get yellow?
Most modern headlights are made from strong polycarbonate plastics and are coated with UV protection to resist fade and yellowing. This protective coating is much like the clear coat on the painted surfaces of a car, truck , or SUV. It is pretty effective and will last for years in most cases, but with a constant beating from the sun, elements, and neglect this UV protection breaks down and your once clear headlights will begin to fade, turn cloudy, and will yellow. While this UV protection is quite durable it does need maintenance, including washing and protection with a wax or sealant or the life of the UV protection will greatly diminish.

How do you restore badly oxidized headlights?
While your cloudy and yellowed headlights look bad, and probably function worse, in most cases you do not need to buy new ones. Headlights are expensive and with some simple products and some elbow grease you can bring your beaten-down headlights back to their glory. In most cases, you need to remove the dullness by sanding off the discolored layer of UV coating. Then you would bring the shine back to the remaining layers of coating by polishing the coating much like the clear coat on your vehicle's paint. Wet sanding your headlights is also the fastest way to remove the foggy layers of the headlights. In less severe cases you can possibly remove the dullness of your headlights with a compound and polish and this is always a good first step before you begin sanding. If the quick polish does not work like you desire it is time to go a little more aggressive with sanding.
There are several ways to sand your headlights but the process and results are all pretty much the same. You can purchase a headlight restoration kit from many companies including Turtle Wax, Meguiars, and Adam’s Polishes. These kits are pretty effective and anyone can use them, and some can be had for as little as $10, but can be as expensive as $50. These kits usually include some sandpaper, a compound, and some polishing pads that in most cases connect to a drill. Overall, anyone can use these kits, but if you are like us and you want a more tried and true method by using products and tools you may already own.
What do you need to restore headlights?
We have been detailing cars for quite some time and the method we prefer for restoring old and faded headlights is simple. We wet sand the headlights with various grits of sandpaper and then use a compound and polish to bring back its luster and shine. Before we get into the whole process of restoring headlights we want to make sure we have everything we need before we get started.
Headlight Restoration Checklist:
- Masking Tape
- Car Shampoo
- Wash Mitt
- Clay Bar
- IPA Solution
- Wet sanding paper in multiple grits (1000, 1200, 1500, 2000, 2500 and 3000 grit)
- Buffing Compound
- Polishing Compound
- 3 inch polisher or smaller
- Microfiber Cutting Pads
- Foam Polishing Pads
- Paint Sealant/Wax/Ceramic Coating
- Microfiber Towels
- Spray Bottle
- Buckets
How to get started restoring your headlights
First things first, we always work on a clean surface when it comes to polishing and correcting any surfaces. Wash the front of your vehicle and the headlights with a high-quality car soap to remove as much grime and dirt as you can. In this case you may want to use a car shampoo that is higher on the Ph scale to cut down on the dirt and grime easier. We really like the two bucket wash method as it helps mitigate contaminants in the wash process that can scratch your paint and cause swirl marks. Even for a small project such as washing your headlights and the front of your car we think a proper wash is the best way to go. Never start correcting any part of your car without a thorough wash or your work won’t be the best it can be.
While for some people that would be enough for them to just get to sanding we like to take some precautions. First things first, open your hood so you can work around the top of your headlight without the hood being in your way. Mask off the remaining painted or plastic surfaces around the headlights with the painters tape. The tape will help contain your sanding area and protect the surfaces you do not want to accidentally sand down or make contact with.
Next, we take our clay bar and decontaminate the surface of the headlamp to remove any embedded dirt or other contaminants. Gently rub the clay bar over the headlights in a crosshatch pattern while keeping the working area wet with a clay lube, detail spray, or soapy water.
After you have thoroughly clayed the headlights you should wash the headlights with your wash mitt, rinse, and then dry.
How to Wet Sand Headlights the Right Way
Wet sanding any surface requires patience. There are no corners you can cut and the elbow grease you put in will speak volumes to your end result. First remember that the lower number on your sandpaper is coarser and the higher the number the more fine the sandpaper.
Keep your sandpaper clean and wet as you work through the project, and to extend the life of your wet sanding paper use a little car shampoo in your water bucket. The little bit of car shampoo helps keep the sandpaper clean and reduces friction. We recommend starting with less aggressive sandpaper like 2000 or 2500 grit and testing an area of the headlights. Keep your sanding strokes in one direction and then switch directions to overlap the sanding scratches. As you sand you will see white or yellow film running off of the headlights. This is why spraying the area with your bottle of water and dipping your sandpaper into clean water is a good practice. Inspect the headlight and look for yellowing or cloudiness that you may have missed. If you feel like you are not making any progress step down to 1000 or 1200 grit sandpaper. This will speed up the project but take your time so you do not overdo it.

After you have finished your first grit of sandpaper you should move up to a finer wet sanding paper. This will remove the scratches from the coarser sandpaper you just used. Continue your straight sanding motions and keep the area wet and then finish with the finest sanding paper you have. This last level of sanding will remove the last sanding paper scratches and refine them so the polishing stage is much easier.

How to Polish Your Headlights & Restore Clarity
After you have finished sanding you will need to polish each headlamp either by hand or by machine polisher. We prefer polishing our headlight restorations with a DA polisher as it is much faster than hand polishing, but if you do not have a polisher don’t fret. Either if you choose to polish by hand or with a machine you may need a couple of different compounds.
It is ideal to use a 3-inch DA polisher as you can maneuver them easily around tight corners and smaller areas on the headlight but not a necessity. We can use a 5-inch or 6-inch DA polisher and the results are the same as a 3-inch polisher but may take a little more finesse. This is also were your taping skills will help you stay on the headlight and not on painted surfaces.
Begin by applying a few beads of the compound on your microfiber or foam polishing pad and work it around the headlight. Then turn on the polisher and begin increasing the speed and working the area with your compound. After you have made a pass or two we recommend inspecting your work and looking to see how things are shining up.
Continue with the current compound and pad for a couple of passes, and then work up to a finishing polish and foam finishing pad. Before you just start trying new pads and compounds, remember to wipe the headlights with your panel prep or IPA spray to help remove additional compound off of the surface. The next step is the jeweling phase and will bring the high luster shine that will make your headlights look great and actually perform much better. Run your polisher with your final polish and pad for a couple passes and then inspect your work again. Look for any spots that need more attention. After you have worked out the entire headlight you should clean it with your IPA wipe one more time. If you are doing this by hand you will continue working the compound in a crosshatch pattern until the headlight turns clear and even.

After all of your compounding and polishing you will want to protect your headlights from turning yellow again. One easy way to do this is by using a paint sealant that has UV blockers. You can use almost anything for this but as with protecting your paint, you will want a durable coating that will hold up to the sun's rays and elements. After you have sealed your headlights you can add a coat of wax for an added layer of protection.
How Often Should I Seal or Wax My Headlights
We recommend maintaining the protection on your headlights at least twice a year and possibly more if you live in the southwest or your vehicle sits outside all of the time. A typical carnauba wax can add a few months of protection to your headlights but a synthetic paint sealants can double that. Ceramic coatings and Graphene coatings can increase that longevity by years and may be a good long-term option for protecting your headlamps. Overall, this process can take as little as 20 minutes and as long as an hour depending on how badly damaged your headlights are. This is one of those tasks that we cannot emphasize enough on taking your time as your life is worth properly working headlight.
If you need any car detailing products for your next car detail, maintenance wash, or headlight restoration look no further than GloveBox Detail. Our monthly subscription boxes will help you protect your vehicle from the sun and elements. For more information on detailing check out our YouTube channel.